Not only is Autumn the season for Blackberries but also apples. If you are lucky enough to have a good blackberry bush nearby as well as a fine apple tree then you will only need to purchase the sugar for this jam! The apple will naturally help this jam to set and become a jelly.
You will need:
The following is just a guidance and you can make more or less, you just need to stick to the ratio.
- 1kilo of fresh Blackberries
- 1kilo of Apples
- ½ pint or 300ml of Water
- Granulated Sugar
Method:
- Wash and pick over the berries, checking for any rotten berries, stalks and insects.
- Chop up the apples (no need to peel or core as you will be straining all the bits out).
- Put them all into a heavy based pan along with the water and bring to the boil.
- Simmer gently for 1 hour and mash the fruit with a potato masher to release the juice from the fruit.

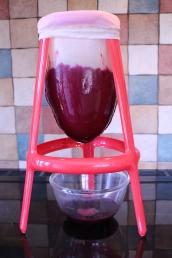
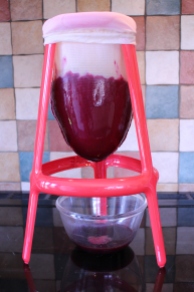
- As soon as the fruit is really pulpy, juicy and mashed, pour though a jelly bag and allow to strain over night, reserving the juice in a bowl or jug.

Tip: if you do not have a jelly bag, pour though a colander over a bowl to remove the big bits, then pour though a sieve over a bowl and allow this to drip over night.
Tip: While the fruit is dripping do stir it and squeeze the fruit from time to time to encourage all the juice out.
- Measure the juice.
- The quantity of sugar needed depends on the amount of juice collected.
1 pint of juice : 1lb Granulated Sugar
500ml Juice : 450g Granulated Sugar
- Add the sugar to the juice and heat gently to dissolve the sugar, then bring to the boil and simmer for at least 20mins, if you have made more jam you will need to simmer for longer.
- Check for setting point.
- Pour into sterilized jars, put lids on and label with the ‘Apple and Blackberry Jam’ and the date you made it.
Tip: Setting point – You can tell when your jelly/jam has reached setting point by dripping a small amount onto a saucer and popping into the fridge for a couple of minutes, when the jelly is set it will wrinkle when pushed with your finger tip.

Tip: Sterilizing the jars is easy, I wash them up, dry them then bake in an oven at 100degrees for 15-20mins. Pour the hot jam into the jars while the jars are hot and fresh out the oven.
Tip: Sterilizing lids is super easy too, after washing up (and a couple of minutes before you require them), I pour freshly boiled water into the lids. Empty the boiled water as you place them on the filled jars.
If sterilized correctly this jam will keep for years! If not it will go moldy very quickly even in an unopened jar.


